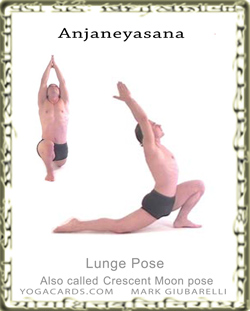
Anjaneyasana
Translation: Crescent Moon pose
![]()
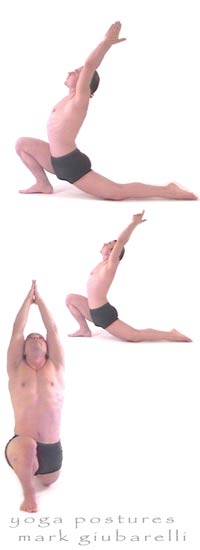
Enter from the lunge pose with the hands supporting you at either side of the leading foot. Gently place the back knee down then let the front knee extend over the foot. (Not all the way after a little while passes slowly deepen forward with the knee.)
![]()
Take the hands off the mat and stretch them up above the head. If your shoulders are not very flexible you can interlock the fingers. This will allow the arms to stretch back further. (Warning! Lean forward a little to relieve pressure from the lower back if it is injured or inflamed.)
![]()
Tips
Try placing something under the knee or above it on the leg that is on the mat if your knee is injured or uncomfortable. Hyper extend the knee that is bent in front of you. Relax forward and the knee is stretched, the posture may be more comfortable.
![]()
Benefits
The quadriceps (rectus femoris, vastus lateralis, Vastus medialis and the vastus intermedius) and the gluteus maximus are stretched. Many of the smaller muscles, tendons and ligaments in the knee are also stretched.
![]()
Hip abductor stabilizers such as the gluteus medius and gluteus minimus, the adductors magnus, longus, and brevis, the gracilis, and the pectineus all become toned.
![]()
Muscles in the arms and shoulders are toned and strengthened. These include the deltoid group, triceps, a little biceps the Trapezius Muscles (Middle and lower), Rhomboids and Latissimus Dorsi. Shoulder elevation also involves glenohumeral movement in combination with scapulothoracic movement and thoracic extension.
Vinyasa Yoga postures to transition from and to:
Tadasana (Standing) ![]() The Standing Forward Bend
The Standing Forward Bend ![]() Triangle Pose
Triangle Pose ![]() Revolved Triangle
Revolved Triangle ![]() Extended Side Angle Pose
Extended Side Angle Pose ![]() Revolved Lunge
Revolved Lunge ![]() Chair Pose
Chair Pose ![]() Virabhadrasana 1
Virabhadrasana 1 ![]() Urdhva Virabhadrasana 2 Urdhva Virabhadrasana 2
Urdhva Virabhadrasana 2 Urdhva Virabhadrasana 2 ![]() Virabhadrasana 3
Virabhadrasana 3 ![]() Ardha Chandrasana
Ardha Chandrasana ![]() Parivrtta Ardha Chandrasana
Parivrtta Ardha Chandrasana ![]() Adho Mukha Svanasana
Adho Mukha Svanasana ![]() ,
, ![]() Eka Pada Adho Muka Svanasana
Eka Pada Adho Muka Svanasana ![]() Salamba Kapotasana
Salamba Kapotasana ![]() Kapotasana
Kapotasana ![]() Ardha Kapotasana
Ardha Kapotasana ![]() Adho Muka Kapotasana
Adho Muka Kapotasana ![]() Parsvottanasana
Parsvottanasana ![]()
![]()
Yoga Teacher Tips
Below are some tips. Always be open to changing the order of your instructions and exploring quicker, clearer and more precise instructions.
![]()
Instruct the flow of breath first, “on the next inhalation”. (This will allow the students to keep their own rhythm in breathing.)![]()
Instruct the name for your advanced students so they can enter swiftly. (This will allow the advanced practitioners to enter with the breath.)![]()
Only a few seconds will have passed for the previous instructions so we can go on to describe how to enter the pose for the beginners. Start with the placement of the hands and allow them to place both on the mat. Then give them the option of keeping the hands down supporting the body and knee. Instruct those with injured knees not to over extend them if there is any pain present. Instruct others to enter slowly with caution. Instruct advanced practitioners to raise their arms above the head with the hands interlocked, palms together or shoulder width apart. You may want to give students the option.
![]()
Re-enforce good breathing.
![]()
![]()
Go on to talk about the form in more detail. The weight on the grounded foot. The alignment of the legs and hips. The torso, shoulders arms and gaze ect…
![]()
Talk about the benefits of this pose.
![]()
Talk about the energy forces in the body. (The fingers may be open or flared energy of together for more direct energy.)
![]()
Try to bring peace to the students minds and remove any suffering the posture may be causing.
![]()
“Always improve the clarity of your voice. The sound and proper tones can always be improved.”
![]()


